Recessed Lighting Planning for Screened Porches in MD & VA
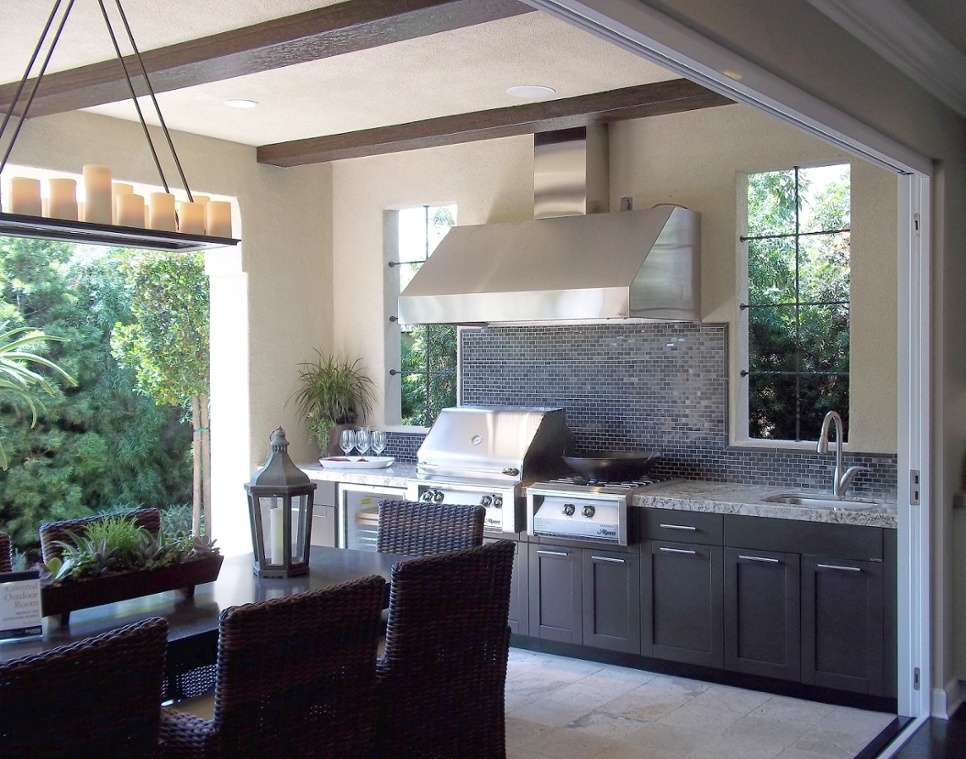
Recessed lighting transforms screened porches into sophisticated outdoor living spaces with clean, modern aesthetics. Whether you're in Montgomery County, MD or Fairfax County, VA, proper planning ensures optimal illumination and functionality. Before installing recessed lights in your custom screened porch design, understand these six essential factors to maximize both style and performance in your outdoor living investment.
1. Determine Ceiling Type
When dealing with an exterior living space, one of the first considerations before installing recessed lighting is determining what type of ceiling you have. Typically this will either be a flat ceiling or a vaulted ceiling, and different kinds of recessed light cans will work with those different types of ceilings. Lots of factors impact the type of lights you should use, so always make sure to discuss your options with your design and build firm.
If you’re just in the planning stages of your screened-in porch and you have your heart set on a specific type of recessed lighting, talk to your build firm early. It could impact the type or layout of your ceiling.
2. Consider How Much Light You Want
The size of your deck and screened-in porch area will largely determine the amount of recessed lights you’ll need to install, but remember that the purpose of these lights is to offer some brightness to the area—without absolutely flooding the space. For aesthetic and functional purposes, it’s not ideal or necessary to fill your ceiling to capacity with recessed lights.
Also, remember that these lights are almost always installed with dimmer switches, which allow you to regulate and to moderate how much light is in the space at any given time.
3. Decide Where to Locate Switches
Most homeowners choose to install all light controls and switches inside the main house. This offers several benefits. For one, when a switch is installed inside there’s no need for the bubble cover that’s required on an exterior switch. This makes for a cleaner, more streamlined appearance. You can also set the lights to specific times and brightness levels and then never have to mess with them again. This means you aren’t stuck making constant adjustments to your exterior light levels.
If you prefer or require your switches to be external, discuss all options and limitations with your build firm.
4. Choose Your Bulbs
Due to its efficiency, the most common type of light installed today, by far, is LED. Halogen is another possibility, but with that option, you will be pulling more power than an equivalent number of LED bulbs. If you’re averse to LED bulbs for any reason, discuss all alternative options with your contractor.
Beyond type, the other major bulb decision is size. This typically comes down to 4” or 6” light fixtures, but the decision is largely about personal preference. While 6” fixtures give you a wider range of lighting possibilities (in terms of bulb size and brightness), 4” fixtures are perfectly acceptable as well. In a kitchen, for example, 6” fixtures can be spaced farther apart, while you’d need more 3” or 4” fixtures to cover the same area, but if you prefer the look of those smaller lights, installing them is a perfectly viable option. You also don’t have to worry much about the difference in how much power these lights pull. Even if you install many more 4” fixtures, LEDS are so efficient that you’re going to see a minimal overall difference.
The only limitation you’d likely encounter would be in soffits and other underneath spaces. In these areas, contractors almost always recommend disc lights because of the size constraints. Especially if you’re talking about something like the underside of a deck, you’ll have waterproofing material, junction boxes, and other impediments to work around, meaning disc lights (as opposed to recessed lighting) are necessary. Disc lights today, however, so closely approximate the look of recessed lighting that not many can actually tell the difference. In these instances, where the working environment constrains the design choices, 4” disc lights are the norm.
5. Think about Other Desired Amenities
It’s important to plan out the entirety of your screened-in porch to ensure all desired amenities work together cohesively. For example, if you want a ceiling fan in your outdoor living space, it’ll need to be far enough away from the installed recessed lights that the moving blades on the fan don’t interfere with the lights and create an unwanted strobe effect. These seemingly small layout details can have a big impact on the functionality of your area, so it’s vital to think through all these possibilities.
6. Coordinate with Trim
When it comes to recessed lighting, you have lots of different color and style options. This is good news for people planning a screened-in porch or those who are renovating or updating one. No matter what aesthetic style you’ve chosen for your outdoor living area, there are recessed lighting options that can stylistically complement the space.
If you’re interested in recessed lighting in your outdoor living space, you can see there are lots of small considerations to take into account. Whether you’re in the planning stages of a brand-new screened-in porch or you’re simply giving your existing one a facelift, give some serious thought to how recessed lighting could maximally benefit your space!